Living Beauty Full in the Burbs
Living Beauty Full in the Burbs


Hey y’all! I have a new project to talk about today. A Flag. But not just any flag, a rustic, neutral flag……because I’m a neutral lovin woman at this stage of my life. Don’t get me wrong, I’m as patriotic as anyone. Mr B is retired Air Force, I love our military, I still get misty at a good rendition of the anthem. We fly our flag on a flagpole attached to the house. But I’m not a red, white and blue decor fan per se. I know, I know, it’s standard, but when do I do anything standard? I’ve had this project percolating in the back of my mind since last summer. A few bloggers got together for a challenge to use neutrals in time for July 4th last year. A neutral flag was one blogger’s answer. I don’t remember who it was, but bless her! It isn’t quite finished but I couldn’t wait to show you!

I didn’t have old fence pickets to use so just asked Mr B to use 1×2’s. I made a little drawing of what I wanted and as usual, he did his he-man garage construction thing and I got my neutral flag! I still have to do a little sanding but I’m really pleased with how it turned out. I mean REALLY pleased. As in, I may have squealed a bit, under my breath of course, so I didn’t disturb the neighbors…. but still a little squeal. Know how you visualize something and it never turns out the way you envisioned???? That’s me. Usually. But not this time! NOPE! My mind’s eye was absolutely in sync with my regular ol’ see everything eyes. Happy dance!
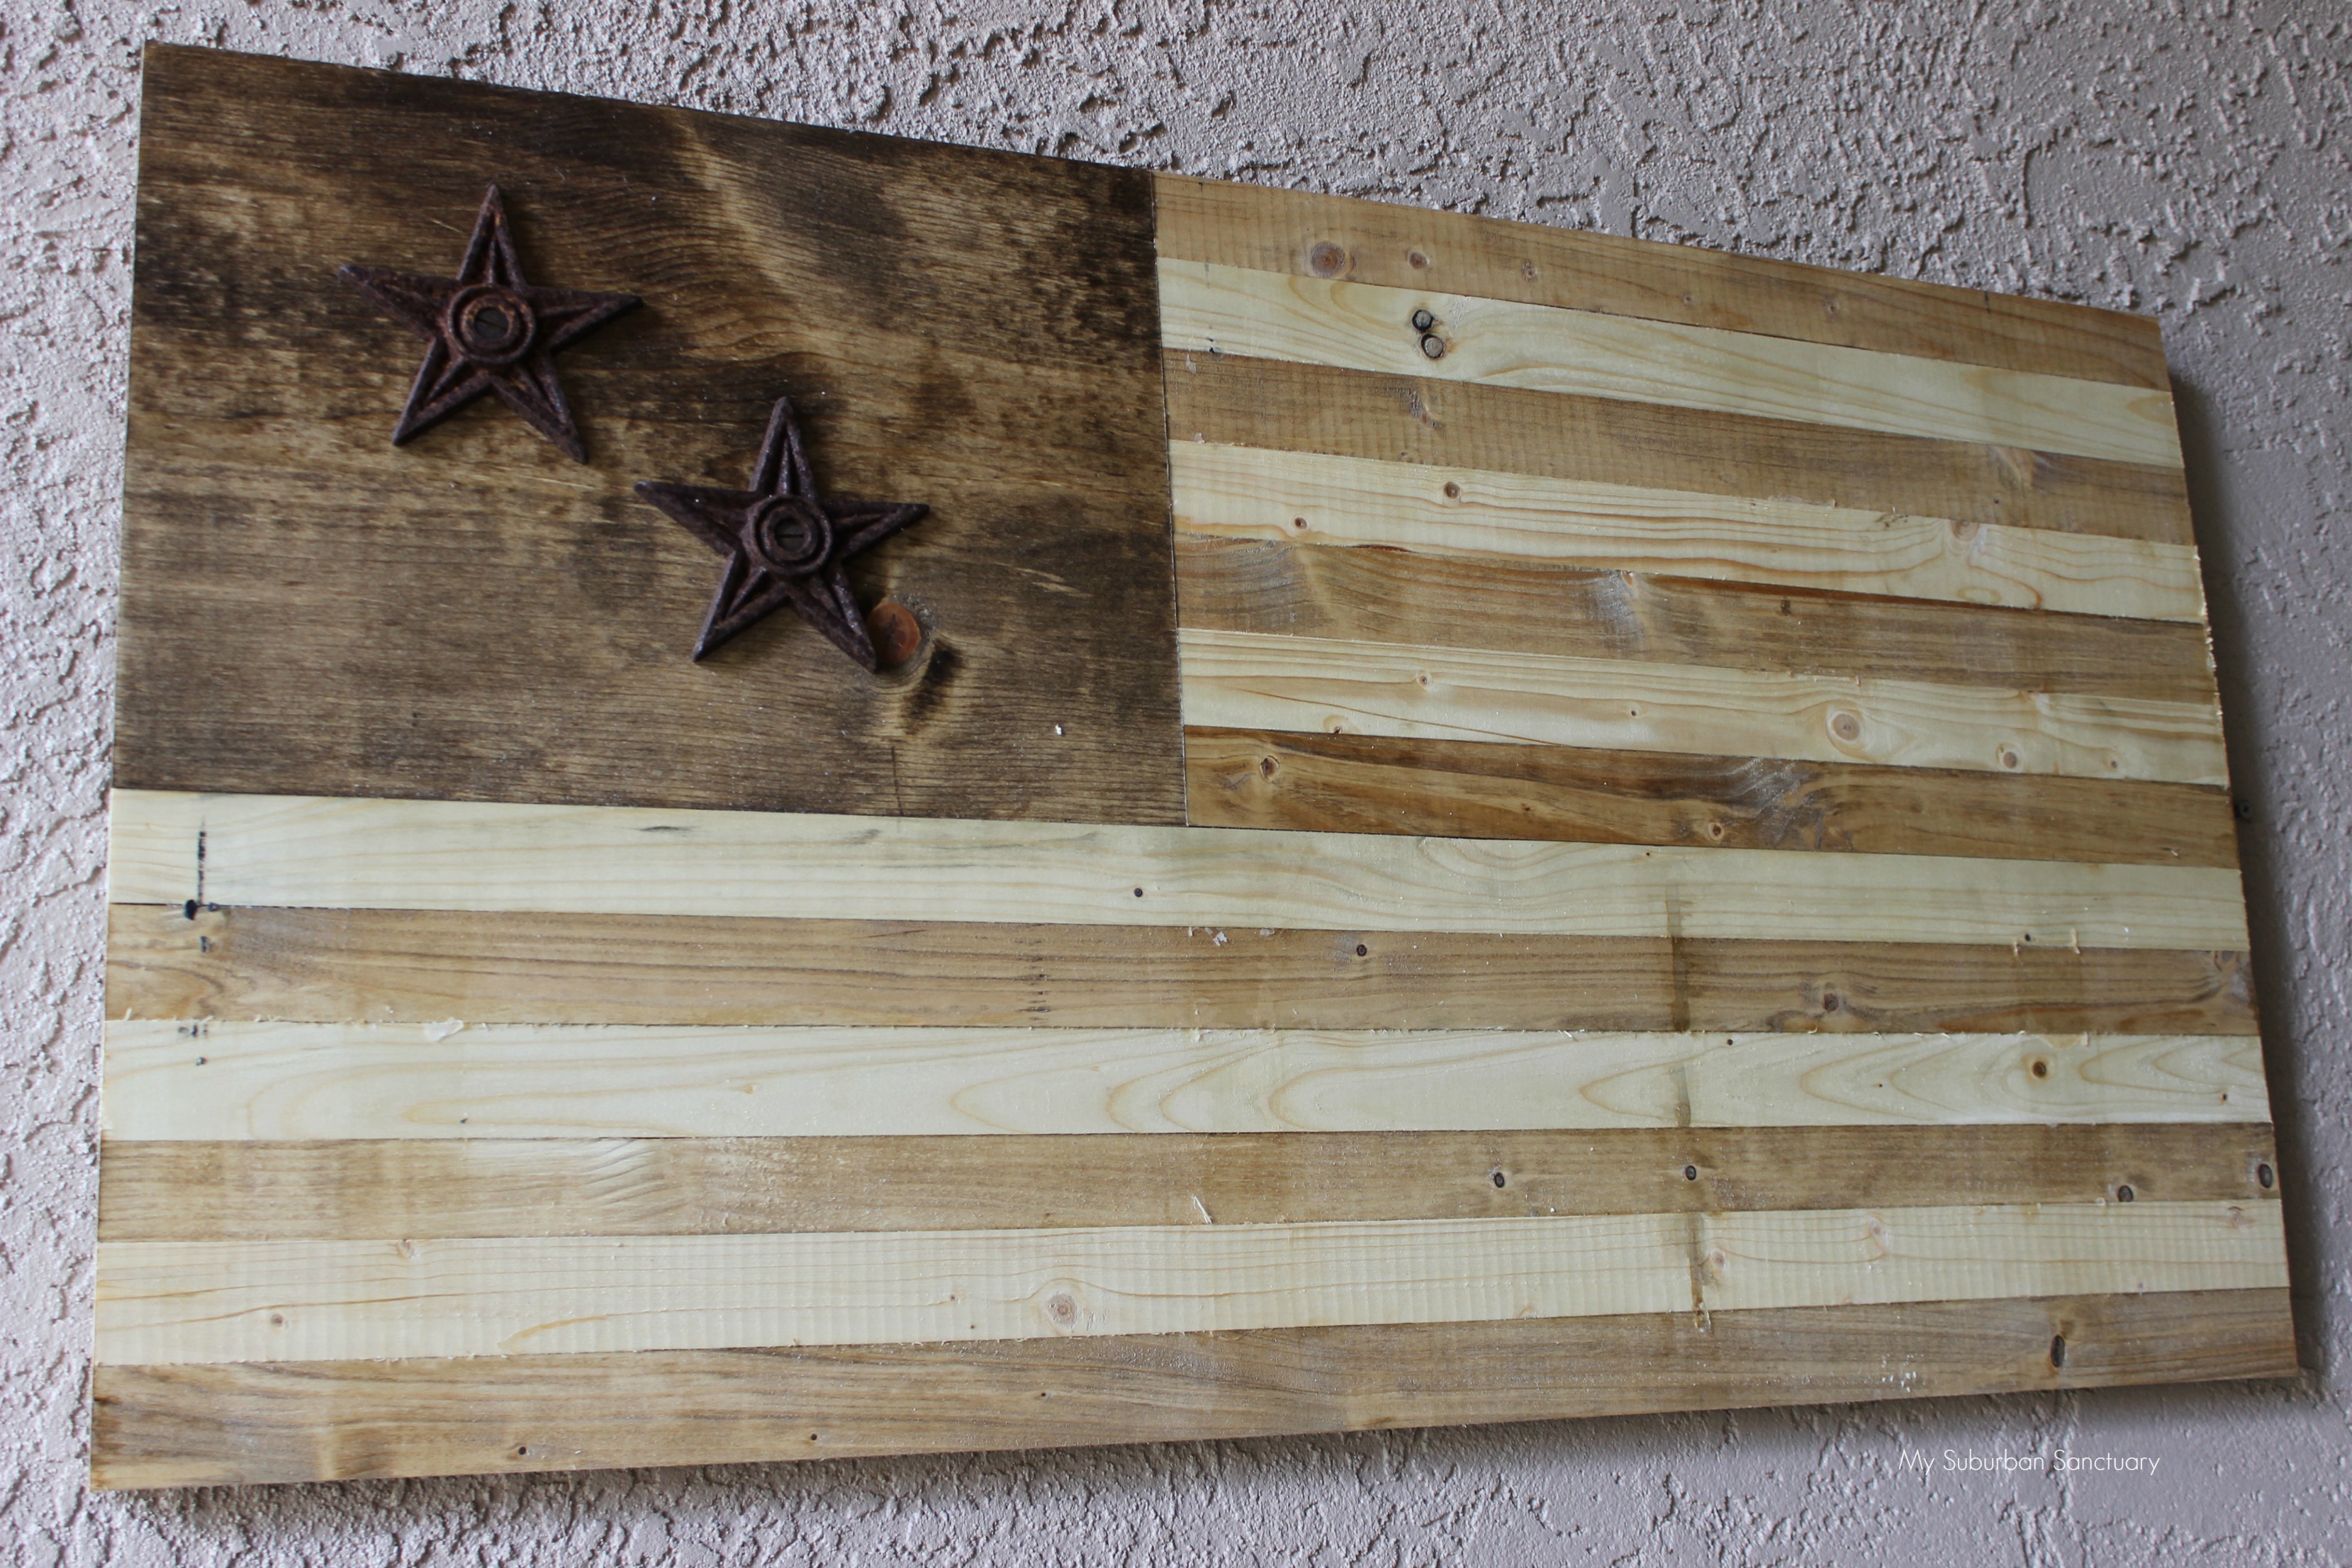
I can’ tell you exactly how it was constructed. It involves math. But I took a few pictures so that you, my friends could figure it out, or have your version of Mr B figure it out if you are similarly math challenged. I told him vaguely how big I wanted it by demonstrating with my hands…..you know, very technical. The finished size of my flag is 19 X 35 inches. The star field is 11 X 15 inches. Materials needed: 13 1×2’s, 1 length of 1×12. Wood glue and clamps, Stainless screws. Wire for hanging.

Cut your pieces to length but leave the stripe boards a bit longer than needed. (Those will be trimmed at the end.) Glue and clamp those together making sure the stripes are in order. Let dry overnight. Cut your stained piece of 1×12 to size then join to the striped section. Mr B used a Kreg jig and screws to attach everything together. Trim the ends of the 1×2’s.

IMPORTANT NOTE: Stain your pieces first, before any trimming, gluing and construction, otherwise you’ll end up with bleeding into your stripes. So stain first and let dry overnight. Use stain in colors of your choice; I stained every other board with Minwax, Golden Oak, for what would be the red stripes. Ipswich Pine diluted with 50/50 mineral spirits to make it lighter for the white stripes and Provincial for the star field. We ended up with one of the 1×2’s not being straight, but some glue and clamping and it was fine.

I have tons of rusty stars in various sizes, but just wanted a couple to complete my stylized flag. And I found already rusted screws that just happened to fit because I never throw anything away. (Insert a Mr B sigh and giant eye roll here.) And there ya have it. Easy peasy. While I wanted this to be rustic and wasn’t concerned with a smooth as glass finish, I still want to knock off some of the splintery ends and clean it up with sandpaper before I give it its final coat of matte poly. And we did end up screwing some luan strips to the back in order to minimize warping from the Florida humidity. Last, we (by “we” I mean Mr B, but you probably already know that) added the wire for hanging. Pretty simple as far as my normal projects go. As soon as I get this baby final sanded and coated with matte poly it will hang on our porch for the rest of the summer. I’ll let you know how it holds up.
There are other options for making a neutral flag. 1. Buy a pre-cut 2×3 piece of pine at one of your big box stores. Or ask the nice man to cut it to size for you. They will do that. Draw your stripes and the field for the stars with a pencil and level. Tape off the stripes and section for the stars and paint. 2. Paint a flag using acrylics on canvas. 3. If you sew, you can make your own flag using neutral fabric. And….If you sew you know all about cutting your pieces larger to allow for seams and hemming. If you don’t, I can’t help you. It involves math. Need I say more?

I hope you have a wonderful summer and decorate in the way that means the most to you. Salute to our Flag, long may it wave. Happy birthday America! And happy summer to each of you. And finally, Thank you for following along with me and all my crazy projects, failures and successes. I read every comment you leave. I respond to every comment. I’m not sure why my responses don’t get to you. I have a tech at Word Press working on it. And for some reason my Instagram photos are no longer showing up. I have to find someone to fix that as well. But you can still follow me on Instagram and I would love that.
No matter what style you love, create your sanctuary, one room at a time. Create the home you see in your heart, no matter where you live.
LOVEEEEEEEEEEE ❤️
Thank yooooouuuuu!
Love it!
Thank you my friend!
I love it Crystal!! Y’all(you did supervise Mr. B after all!!)totally nailed this one❤️
Why yes…yes I did. So that counts right? It’s as if I made it myself…..right????
6 Comments